How to Fix Sole Separation on Sneakers Safely

A lifting toe edge or peeling outsole can make a favourite pair feel finished, but sole separation is sometimes repairable when the materials underneath are still sound. The safest fix is not simply squeezing glue into the gap. You need to identify what has failed, choose an adhesive suited to the materials and let the repair cure properly before wearing the sneakers.
This guide covers small, localised repairs on everyday pairs, including Nike sneakers and Jordans. It also explains when to stop and take the shoes to a cobbler, particularly if you are dealing with older midsoles, valuable collectables or separation that affects stability.
Is sole separation safe to repair at home?
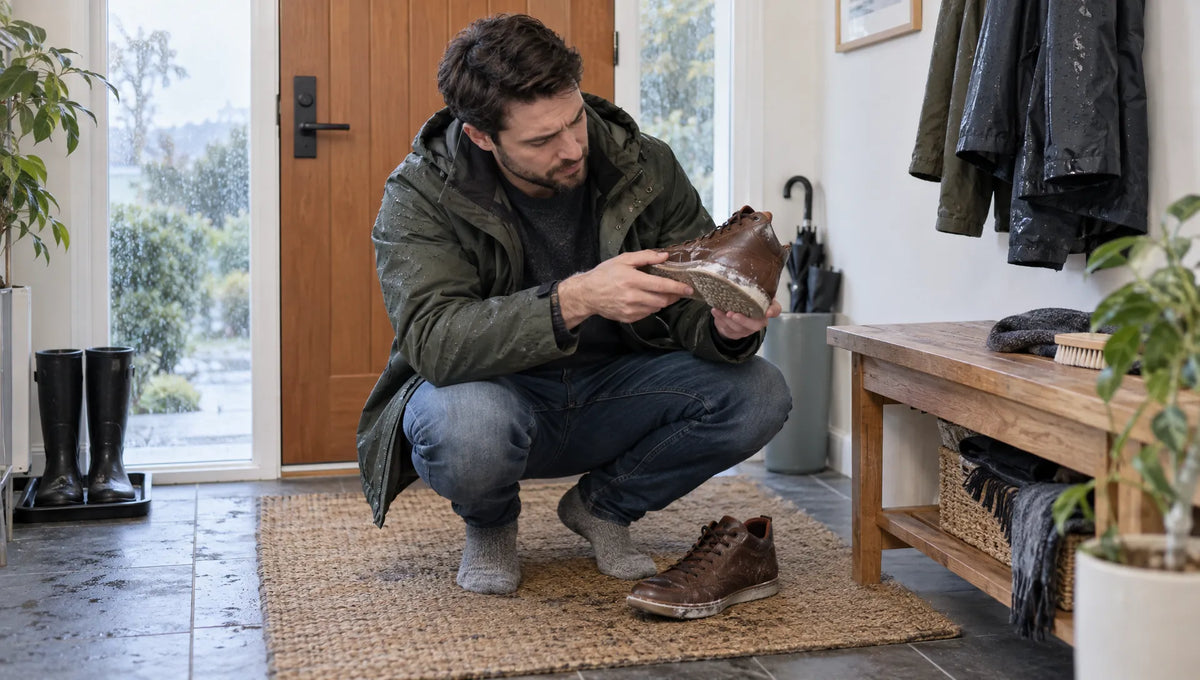
Start by taking the sneakers off and checking both shoes in good light. Do not keep walking in them to see whether the gap gets worse. A loose outsole can catch on the ground, while separation around the heel can affect stability.
Look at the exposed surfaces without pulling the gap wider. A clean separation between two firm layers may be an adhesive failure. Foam that crumbles, tears or comes away with the detached layer suggests the material itself has failed.
| What you find | Sensible next step |
|---|---|
| Small edge lift with firm, intact surfaces underneath | A careful DIY repair may be suitable |
| Crumbling, powdery or sticky midsole material | Seek a specialist assessment; glue will not rebuild degraded foam |
| Large areas peeling away or separation at several points | Use a cobbler or sneaker repair specialist |
| Torn stitching, cracked support parts or a damaged air unit | Get professional advice before wearing the pair |
| A valuable vintage or limited-edition pair | Discuss repair options and likely cosmetic changes with a specialist |
A small gap is not automatically a minor problem. Its location matters, as does the condition of the surrounding material.
Check your purchase rights before applying glue
If the sneakers appear faulty rather than worn out, photograph the problem and contact the retailer before attempting a repair. Altering the shoes can make it harder to establish what originally failed.
New Zealand’s Consumer Guarantees Act includes guarantees about acceptable quality and durability for qualifying consumer purchases. Whether a remedy is available depends on the circumstances, including the shoes’ age, use and condition. Do not assume that an expired manufacturer warranty necessarily ends your consumer rights.
Recognise when the midsole is deteriorating
Some older polyurethane midsoles deteriorate through hydrolysis, a chemical breakdown involving moisture. They can crumble even when a pair looks relatively unworn. Other foams can split or lose structural integrity through age and use.
Adhesive needs a stable surface to hold onto. If that surface breaks apart, adding more glue will not provide a dependable repair. Widespread deterioration may require a specialist sole replacement, if a suitable replacement and repair method are available.
Choose the right adhesive for sole separation
Use a flexible footwear adhesive that explicitly supports the materials you are joining. A sneaker may combine rubber, EVA foam, polyurethane, leather, fabric or thermoplastic components, so a product described as suitable for “rubber” is not automatically suitable for the whole shoe.
Check the product label and technical instructions for material compatibility, surface preparation, application method and full cure time. Some plastics require specialist primers or treatments. If you cannot identify the material or confirm compatibility, ask a cobbler rather than experimenting.
| Adhesive type | What to check before using it |
|---|---|
| Flexible shoe-repair adhesive | Compatibility with both surfaces, permitted gap size and curing instructions |
| Footwear contact adhesive | Whether both surfaces need coating, the waiting period before joining and any primer requirements |
| Standard household superglue | Usually a poor default for a repeatedly flexing sole joint unless specifically formulated and approved for that application |
| Hot glue, PVA or rigid general-purpose epoxy | Avoid as a substitute for a suitable flexible footwear adhesive |
A moisture-curing repair adhesive and a contact adhesive may need very different techniques. Do not combine instructions from different products. For example, some contact adhesives must become touch-dry before the surfaces meet, while other products require assembly while the adhesive is wet.
Avoid DIY products or procedures that require heat activation unless you have the appropriate equipment and training.
Prepare a safe workspace and repair kit
Work somewhere dry, well ventilated and away from children, pets, flames and ignition sources. Solvent-based adhesives may release flammable vapours. Follow the label and safety data sheet, including any requirements for eye protection and suitable chemical-resistant gloves.
If you cannot meet the ventilation requirements at home, have the repair done professionally. An ordinary dust mask is not protection against solvent vapours.
For a small repair, you will generally need:
- A compatible flexible footwear adhesive and its instructions.
- A soft brush, lint-free cloth and a cleaner approved for the surfaces involved.
- A small applicator, if the product allows one.
- A padded clamp or another pressure method recommended by the adhesive manufacturer.
- Paper or a shoe insert to support the sneaker’s shape without stretching it.
Cover the work surface and keep the adhesive away from the upper, lining and insole. Before starting, read the whole application process so you know how quickly you will need to align and secure the sole.
How to fix sole separation step by step
The following process is for a small, accessible gap between intact materials, not a complete sole removal or reconstruction. The adhesive manufacturer’s instructions take priority over any general repair advice.
1. Clean the accessible bonding surfaces
Gently brush away loose dirt from the exposed joint. Remove only adhesive residue that is already loose and can be lifted without tearing the underlying material. Do not prise the sole farther apart to create working space.
Use the cleaning method specified for your adhesive and shoe materials. Acetone, paint thinner and other strong solvents can damage finishes, plastics and foam, so do not use them as universal glue removers.
If the visible upper also needs attention, follow a material-specific sneaker cleaning routine rather than soaking the shoe. Dirt removal helps preparation, but detergent residue inside the joint can interfere with bonding.
Only lightly roughen a surface if the adhesive instructions call for it and the material can tolerate it. Do not sand painted areas, thin foam or an unidentified plastic just because another repair tutorial recommends sanding.
2. Let the joint dry and check the fit
Allow all cleaning moisture to dry naturally. A surface can feel dry while moisture remains inside foam or fabric, so give the area time rather than using a hairdryer, radiator or tumble dryer.
Gently bring the surfaces together without adhesive. Check that the outsole meets the midsole in its original position and that no loose material is trapped between them.
Plan where the clamp or support will sit. If the gap will not close without substantial force, or the sole appears distorted, stop. Glue should not be used to force damaged components back into shape.
3. Apply the adhesive exactly as directed
Use the amount and coating method specified on the product. More adhesive is not necessarily stronger: excess can spill onto the upper, prevent the surfaces sitting flush or cure poorly in an unsuitable joint.
Keep the application within the exposed bonding area. Do not inject adhesive into an air unit, deep midsole cavity or inaccessible part of the shoe.
For contact adhesive, follow the instructions for coating each surface and allowing the required waiting period. For an adhesive assembled while wet, align the surfaces within its stated working time.
If the product requires a primer you do not have, do not skip it and hope the bond will hold. Choose an appropriate alternative or use a professional repairer.
4. Align the sole and apply controlled pressure
Bring the surfaces together carefully, using the original edge alignment as your guide. Some contact adhesives grip immediately, leaving little opportunity to reposition the outsole.
Apply even pressure using the method recommended by the manufacturer. Protect visible surfaces from clamp marks with suitable clean padding and support the shoe so its shape is not distorted.
A clamp should hold the joint closed, not crush the midsole. Tight rubber bands can dent soft foam, while a heavy weight on top of the shoe may fail to press the actual repair area together.
Deal with adhesive squeeze-out only as the instructions permit. Wiping a wet bead across suede or mesh can turn a small excess into permanent staining.

5. Allow the full cure time
Leave the sneaker undisturbed for the full period specified by the adhesive manufacturer. “Set”, “handling strength” and “fully cured” do not necessarily mean the same thing.
There is no universal overnight rule for sole separation repairs. Cure time can depend on the product, adhesive thickness, temperature and humidity. Follow the stated conditions rather than speeding things up with heat.
Keep the pair out of direct sunlight and away from heaters. Do not seal a solvent-based repair in a plastic bag or closed shoebox while it releases vapours.
Remove pressure supports at the instructed stage, then wait until the product permits use. Avoid repeated flexing to check progress, as this can disturb a bond before it reaches full strength.
6. Inspect before returning to wear
Once fully cured, inspect the edge for gaps, misalignment or areas that have not bonded. Gently flex the shoe by hand within its normal movement. Do not aggressively bend it or pull on the repaired section.
If the bond opens, stop there. Adding another layer of glue over a failed repair may hide the cause without fixing it.
When the repair appears secure, try brief, low-demand wear on a dry, level surface and inspect it again afterwards. Do not use an uncertain home repair for basketball, running or other activities where sudden failure could cause injury. A visually tidy repair does not prove that the shoe’s original performance has been restored.
What to do if the repair fails
Repeated sole separation usually means something in the repair needs reassessment, not simply a stronger-looking glue.
| Problem | Possible cause | Next step |
|---|---|---|
| The joint opens soon after use | Incompatible adhesive, contamination, insufficient curing or movement during curing | Stop wearing the pair and have the materials and process assessed |
| Foam comes away with the glued layer | Failure within the midsole material | Seek specialist advice; further edge gluing is unlikely to solve it |
| One area holds while another lifts | Uneven preparation, contact or pressure | Avoid repeated patching without identifying the cause |
| Adhesive remains soft beyond the stated cure period | Unsuitable conditions, excessive application or product problems | Check the manufacturer’s guidance before further handling |
Take clear photographs and retain the adhesive packaging if you seek help. Tell the repairer what you applied and whether you used cleaners, solvents or heat. That information can affect how safely they remove residue and prepare a new bond.
Protect the repair and the pair’s value
Once the shoes are back in use, let them dry after wet outings and inspect the repaired edge periodically. Keep them away from hot cars, direct heater drying and storage conditions that trap moisture.
Good storage cannot reverse degraded foam, but it helps avoid unnecessary exposure to heat and damp. Our guide to storing sneakers in NZ’s humid weather covers practical ways to manage moisture between wears.
For collectable Jordans or limited-edition sneakers, repair decisions also affect presentation and resale. Visible glue, altered finishes or replacement components may matter to buyers. A professional repair can still change a pair’s originality, so ask what work is proposed before agreeing to it.
Keep before-and-after photographs and disclose repairs if you later sell the sneakers. Do not describe a repaired sole as untouched or assume that fresh adhesive makes an old pair suitable for regular wear.
Frequently asked questions
Can I use superglue to fix a sneaker sole? Standard household superglue is usually not the right default for a flexible sole joint. Choose an adhesive specifically suitable for footwear and the materials involved. A specialist flexible formulation may behave differently, so check its stated uses rather than relying on the name alone.
How long should I wait before wearing repaired sneakers? Wait until the adhesive reaches the manufacturer’s stated full cure and permitted-use time. A bond that feels dry or holds together by hand may not be ready for walking. Temperature, humidity and the amount applied can affect the timing.
Can sole separation on Jordans always be repaired? No. A small adhesive failure between sound surfaces may be repairable, but crumbling foam, damaged support components or extensive separation needs specialist assessment. Older pairs can have material deterioration that glue alone cannot resolve.
Should I heat the sole to make the glue stick? Do not use an iron, hairdryer or heat gun as a general DIY fix. Heat can damage foam, finishes and nearby adhesive bonds, and it can create risks around flammable products. Heat-activated repair systems belong with someone trained to use them.
Is a repaired sneaker waterproof? Do not assume so. Closing a visible gap does not establish that the joint or the rest of the shoe is watertight. Unless the footwear and repair method are specifically rated for it, avoid treating the repair as protection against soaking.
Repair carefully, replace when necessary
A small edge lift may be worth repairing when the underlying materials are intact. Crumbling foam, unstable components or a repeatedly failing joint are reasons to stop wearing the pair and seek professional advice.
If repair is no longer practical, you can browse authentic sneakers at BigBoiSneakers for a replacement. Keep any retired collectable pair for display only if its condition makes it unsafe to wear.