How to Clean Suede Sneakers Without Ruining the Texture
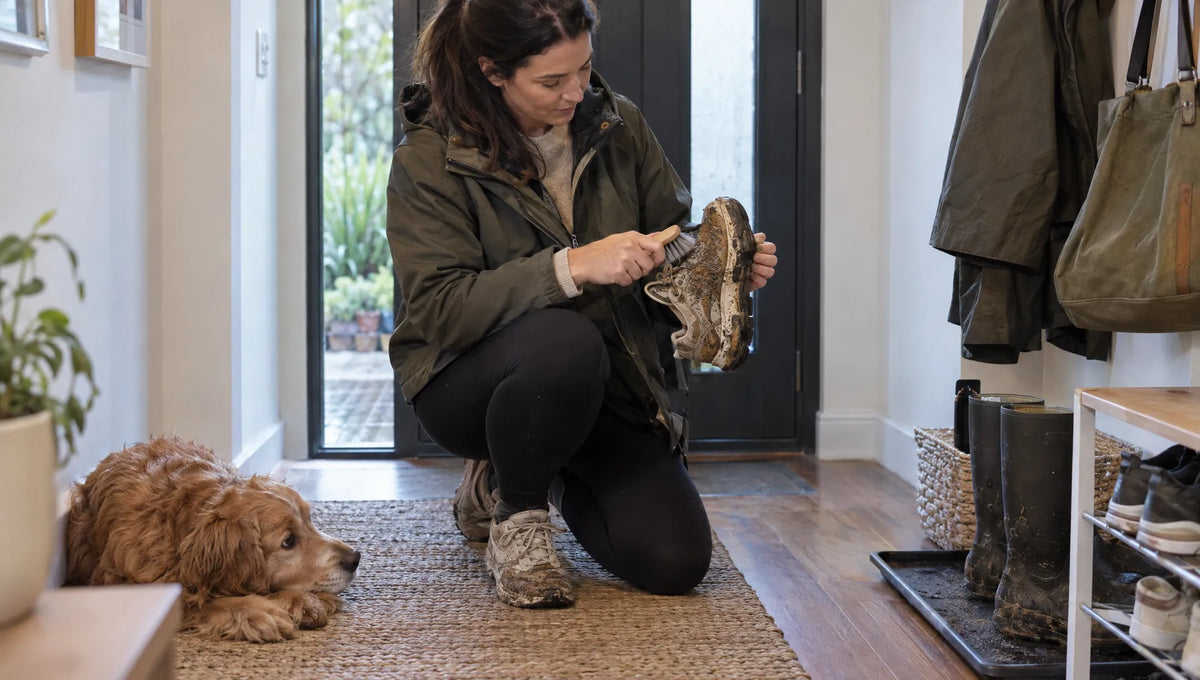
To clean suede sneakers without ruining their texture, start with a dry shoe, remove loose dirt gently and use as little moisture as possible. The soft, raised fibres that give suede its finish can flatten, clump or lose colour when scrubbed too hard. A muddy toe box usually needs patience and light brushing, not a sink full of soapy water.
This guide focuses on preserving that texture, including when to use a suede eraser, how to approach stains and when to stop cleaning at home.
Why suede needs a different cleaning method
Suede has a raised surface called the nap. Those tiny fibres catch light differently depending on their direction, which is why brushing can change the apparent shade of a panel without actually changing its colour.
Before treating a dark patch as a stain, gently brush the surrounding fibres into the same direction. If the patch changes appearance, flattened nap may be part of the problem.
On black suede, such as the upper of the Jordan Air Jordan 5 Retro Black University Blue Basketball Sneakers, dust and unevenly flattened fibres can look particularly noticeable. Scrubbing harder can make the surface look less consistent rather than cleaner.
Cleaning can lift compressed fibres, but it cannot replace suede that has worn away. A smooth, bald patch needs a different expectation from a dirty one.
What you need before you start
Keep your kit simple. You do not need several household chemicals or a stiff scrubbing brush.
- A clean, soft suede brush suitable for footwear
- A suede eraser for localised dry marks
- Clean white lint-free cloths
- Plain white absorbent paper to support the shoe
- A cleaner explicitly labelled for suede, if dry cleaning is not enough
Check that the brush itself is clean, especially if it has previously touched muddy soles or darker shoes. Transferred dirt can create a new mark on pale suede.
Avoid wire brushes as your starting tool. Delicate sneaker panels need less pressure than a heavily worn pair of work boots.
How to clean suede sneakers step by step
1. Check the material and test your tools
Read the shoe’s care instructions before applying anything. Sneakers often combine suede with leather, textile, synthetic overlays or printed details, and one cleaner may not suit every panel. Nubuck and faux suede also need products approved for their particular finish.
Test your brush, eraser and any cleaner on a small, discreet area first. For liquid products, let the test patch dry completely before checking for colour change, a stiff finish or disturbed fibres.
This matters especially with light-coloured uppers, including the pink-toned suede on the Adidas Gazelle Indoor Bad Bunny Cabo Rojo Sneakers. A treatment that looks harmless while damp can leave a visible edge once dry.
Remove the laces if they obstruct the suede panels. Clean them separately rather than letting water drip onto the upper.
2. Let wet suede and mud dry naturally
If the shoes are wet, blot surface moisture with a white cloth. Press gently instead of rubbing, then loosely fill the shoes with plain white paper to help support their shape. Replace the paper if it becomes damp.
Leave them in a shaded, ventilated place away from heaters and direct sunlight. Do not start brushing while the fibres are wet.
Let mud dry before removing it. Working wet mud into the upper pushes dirt deeper into the nap. Nike’s guidance on cleaning suede shoes likewise recommends allowing shoes to dry before brushing.
Drying time depends on how wet the shoe is and the surrounding conditions. Check the material rather than relying on a fixed overnight deadline.
3. Brush away loose dirt with light pressure
Support the shoe with one hand and make short, gentle strokes with the suede brush. Begin in one direction, working across each panel without repeatedly scrubbing the same spot.
For dried mud, loosen the surface gradually. Do not dig at stubborn pieces with a fingernail or scrape them off with a sharp edge.
Pause occasionally to clear dirt from the brush. Once loose particles are gone, reassess the shoe before moving to another treatment. Often, brushing alone is enough to clean suede sneakers that have picked up everyday dust.
Keep the upper brush separate from any brush used on the outsole. Grit trapped in a sole brush can scratch or dirty the suede.
4. Use a suede eraser on remaining dry marks
A suede eraser can help with small surface scuffs that brushing leaves behind. Use it only after the shoe is dry and loose dirt has been removed.
Apply light pressure in short strokes, then brush away the eraser crumbs. Check the result frequently instead of rubbing until the mark disappears at any cost.
Stop if the area becomes noticeably lighter, smoother or fuzzy compared with the surrounding material. Some marks involve dye loss or abrasion, not removable dirt.
A suede eraser is preferable to a coloured stationery rubber, which may transfer pigment or leave an unsuitable residue. Even a purpose-made eraser still needs a discreet patch test.
5. Use a suede-approved cleaner only if needed
If dry methods are not enough, choose a footwear cleaner that explicitly lists suede as a suitable material. Follow its instructions for dilution, application and removal. A general-purpose sneaker cleaner is not automatically safe for suede.
Where the directions call for damp application, use the specified amount and method. Do not saturate the shoe or assume that more foam means better cleaning.
Avoid repeatedly soaking the centre of a stain. Uneven wetting can leave a ring, so follow the product’s instructions on treating the surrounding area or full panel evenly.
Use a clean white cloth where directed and stop if you see obvious colour transfer or a change in texture. Do not keep adding cleaner to chase a mark that is not improving.
6. Let the shoe dry, then reset the nap
Allow the cleaned shoe to air-dry fully before brushing again. Keep it supported with plain paper, without packing the toe box so tightly that it stretches.
Once dry, use light strokes to separate compressed fibres. Finish by brushing the panel consistently in one direction for a more even appearance.
If an area still looks stiff, check for cleaner residue and consult the product’s removal instructions. Do not automatically add another round of liquid.
The safest way to clean suede sneakers is to stop once they are clean enough to wear, rather than repeatedly treating a faint mark until the surrounding material is damaged.

Match the treatment to the stain
Different marks need different responses. This table is a starting point, not a guarantee that every stain will lift at home.
| Mark or stain | Safest first response | What to avoid |
|---|---|---|
| Loose dust | Brush the dry upper gently | Adding water before removing particles |
| Fresh mud | Let it dry, then brush off gradually | Rubbing wet mud into the fibres |
| Dry surface scuff | Patch-test a suede eraser and use light pressure | Repeated hard rubbing |
| Rain marks or water rings | Let the shoe dry, brush lightly and assess before using an approved cleaner | Repeatedly wetting only the centre of the mark |
| Fresh oil or grease | Blot gently with a clean cloth and seek specialist advice promptly | Rubbing, soaking or applying leather conditioner |
| Salt residue | Let it dry, remove loose residue gently and consult suede-specific care instructions | Assuming a smooth-leather cleaning recipe is suitable |
| Ink, dye transfer or mould | Seek a professional experienced with suede | Bleach, strong solvents or aggressive brushing |
For oil stains, stop before experimenting with washing-up liquid or kitchen powders. Absorbent powders can lodge in the nap, especially on dark suede, and a greasy mark may need specialist treatment.
Mould also deserves a different approach from ordinary dirt. Avoid brushing it around your living space or storing the affected pair with other shoes before it has been assessed.
Mistakes that flatten or discolour suede
Do not machine-wash, tumble-dry or fully submerge suede sneakers. Water, agitation and heat can affect the nap, dye, shape and bonded components.
Skip hairdryers, radiators and sunny windowsills when drying. Faster drying is not worth risking a stiff upper or uneven colour.
Smooth-leather polish, oils and conditioners are also unsuitable unless the manufacturer specifically approves them for that suede finish. They can darken the material and mat down the fibres.
Vinegar and rubbing alcohol appear in many stain-removal tips, but they are not universal solutions. Some care instructions permit particular spot treatments, while other finishes may react badly. Do not treat an untested household recipe as safer than a labelled suede product.
Finally, avoid cleaning the entire pair repeatedly to remove one stubborn blemish. Additional friction can turn a small stain into a larger worn patch.
Protect the texture between cleans
A quick brush after a dry outing can remove dust before it becomes embedded. Let damp shoes dry first, and give the brush a clean before using it on another pair.
A protector labelled for suede may help reduce water absorption and staining, but it will not make the shoes waterproof. Patch-test it, apply it only to clean, dry material and follow the stated drying time before wearing. Our guide to making sneakers more water-resistant in NZ’s wet weather explains the limits of protective treatments.
Storage matters too. Do not seal away shoes that are still damp from rain or wear. Keep them somewhere dry and ventilated, away from direct sunlight. For longer periods between wears, follow these tips for storing sneakers in NZ’s humid weather.
Frequently asked questions
Can you clean suede sneakers with water? Some suede-approved cleaners require limited moisture, but soaking is not a safe default. Start with dry brushing, then follow the shoe manufacturer’s instructions and your cleaner’s directions. Patch-test any wet treatment first.
Why does suede look darker after cleaning? Damp suede often appears darker, while fibres pointing in different directions can also change its appearance. Let the material dry fully and brush gently before deciding whether it is stained. Persistent darkening may indicate residue, oil or a colour change.
How do you make suede soft again after cleaning? Once the shoe is completely dry, gentle brushing may separate compressed fibres and improve the feel. Stop if the surface starts shedding or becoming rough. Brushing cannot repair fibres that have worn away.
Can you use a toothbrush on suede? A clean, very soft toothbrush may help with light dust in a small area, but a dedicated soft suede brush is a better starting point. Avoid stiff bristles and never reuse a toothbrush with toothpaste residue.
When should you use a professional cleaner? Seek help for valuable pairs, deep oil stains, ink, mould, widespread dye transfer or a failed patch test. Tell the cleaner what you have already applied so they can assess the next treatment.
Give your next pair a better start
Before the next wear, check that your suede is dry, lightly brush the nap and plan around the weather. When browsing sneakers at BigBoiSneakers, check the upper materials as carefully as the colourway. Choosing a pair that suits your routine makes keeping its texture intact much easier.